
Microsoft has taken the good, old familiar Start menu and promoted it to its own screen after the login screen. Initially reaction to this new screen was less than enthusiastic (awful) by many users as we were use to our Desktop and Start button The new Start screen looks the same on any Windows device which is nice to have the same look and feel of our operating system no matter the device plus Windows 8 has great touch screen abilities.
You may right click using a mouse or tap and hold for a moment using a touchscreen to get a menu at the bottom of your screen that allows you some neat and productive actions for each of your application’s tile, such as Pin to your Taskbar, Pin to your Start, Uninstall, and other options. Some customize options offer the resize option for your tiles. You may group your apps and rename the groups, too. You can click and drag your apps as you like to rearrange your tiles to suit your needs and organize your apps.
As pictured below, I have rearranged my apps and grouped them by my favorites and Microsoft Office on my Start screen. If you click the arrow at the lower left of your Start screen or swipe up on a touchscreen, the All Apps view appears. This displays ALL of your apps, tools, accessories, and other items. I have my Outlook tile selected with the customize menu displayed at the bottom of this post. You should pin your favorite and often used apps to your Start screen and your taskbar from the All Apps view – we’ll learn later why this is helpful too you. So, have it your way and customize your Start screen.
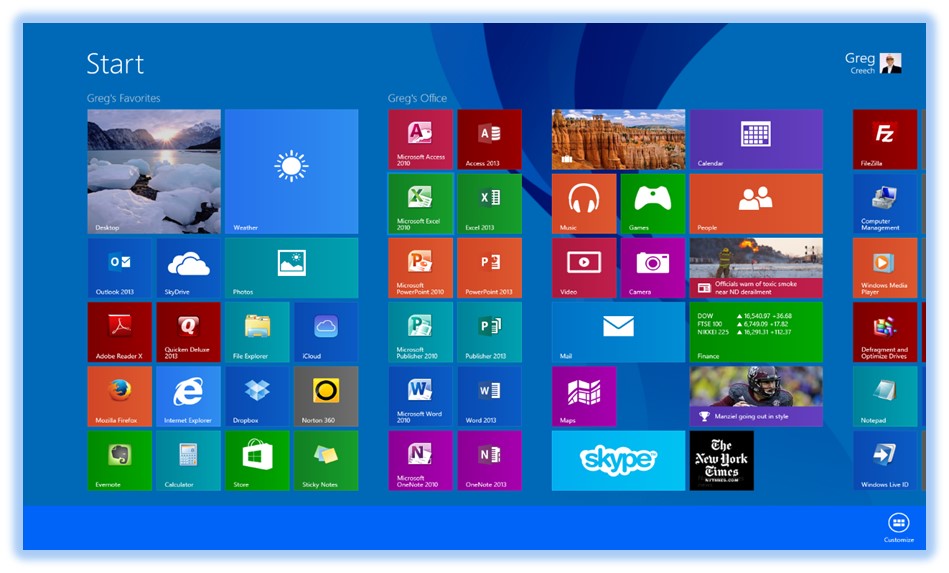
Start Screen
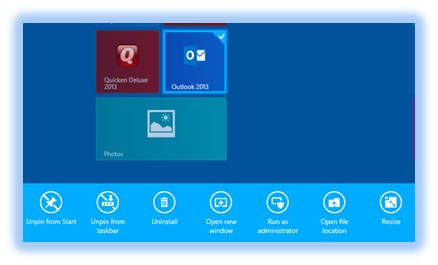
- Customize Windows Tile